
Table of contents
User Manual – User Management
The User Management module allows administrators to manage individuals authorized to access the Dropioo platform.
From this module, you can:
View the user list.
Add a new user.
Create and manage roles.
Assign a role to a user in order to control their access rights.
Effective user management ensures the security of your platform while allowing each team member to access only the features necessary for their work.
Accessing the User Management Module
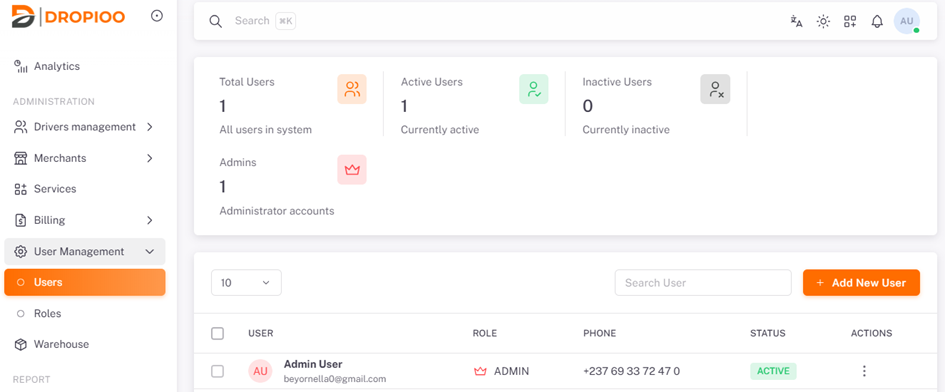
From the platform's main menu, click on User Management.
This module provides access to the following sections:
Users
Add New User
Roles
Add New Role
User Management
Overview
The Users page displays all users registered on your platform.
Each row represents a user and contains key information regarding their account.
This list includes:
User Name
Email address
Phone number
Assigned role
Account status
Creation date
This interface also allows you to quickly locate a user using the search and filtering tools.
Adding a New User
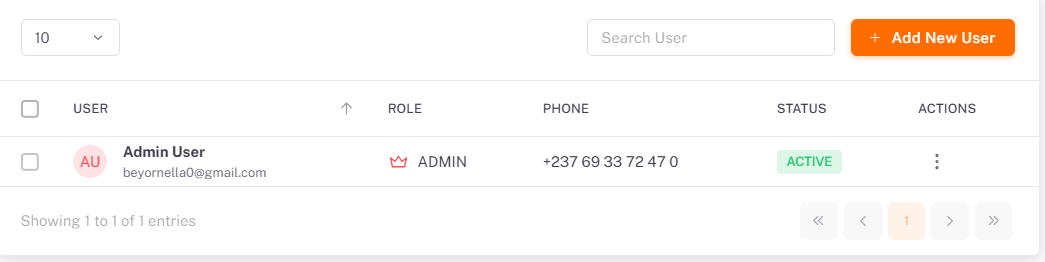
When a new team member joins your company, you must create their account so they can access the Dropioo platform.
Open the User Management module.
Click on Add New User.
Fill in the required information.
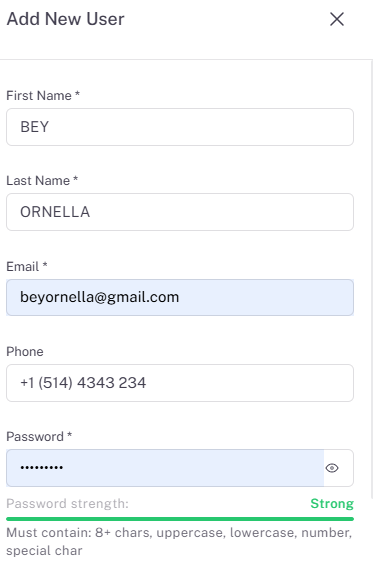
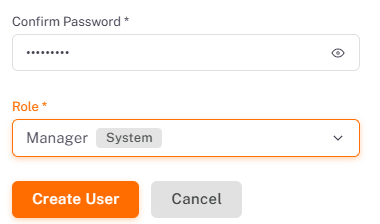
Typically required information includes:
Full name
Email address
Phone number
Role
Password (if prompted)
After verifying the entered information, click on Create User.
The new user is immediately added to the platform. An activation email may be automatically sent to the new user.
Best Practice: Only assign the rights necessary for each user's specific responsibilities.
Role Management
Overview
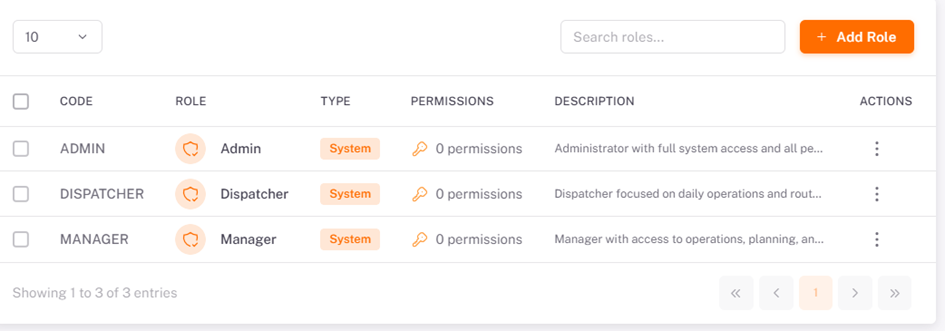
Roles allow you to define the permissions granted to users. Each role determines which features a user can access.
For example, some users may only view orders, while others can manage partners, modify settings, or administer the entire platform.
Proper role management enhances security and simplifies access administration.
Adding a New Role
Overview
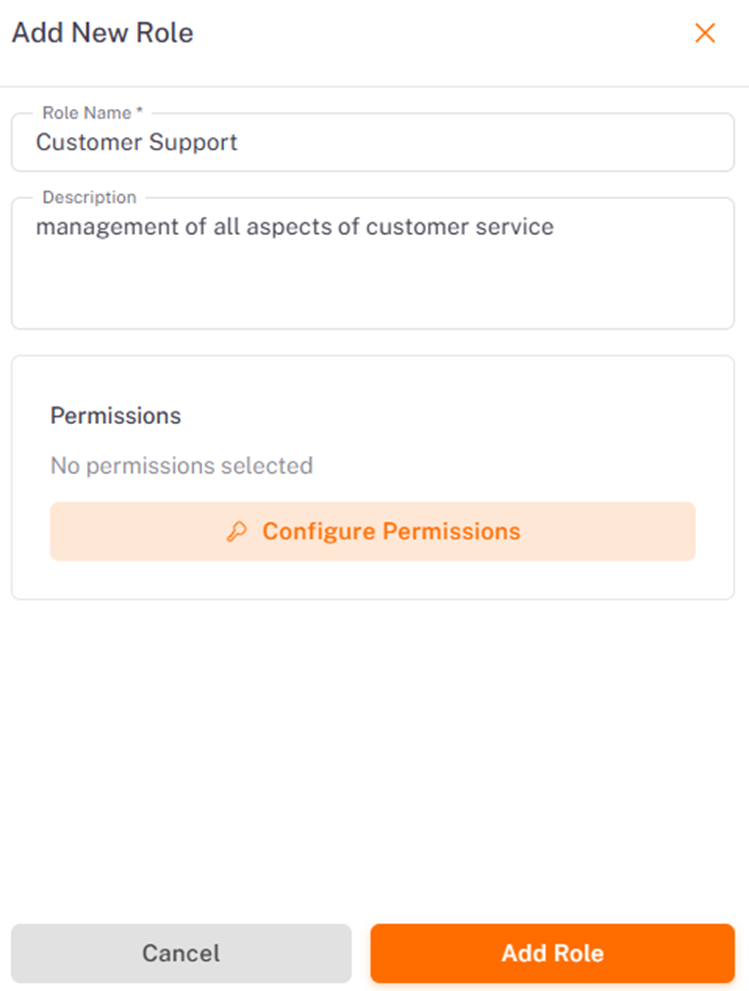
Creating a role allows you to tailor permissions to your company's specific needs.
Procedure
Open the Roles module.
Click on Add New Role.
Enter the role name.
Examples:
Administrator
Operations Manager
Dispatcher
Customer Support
Warehouse Manager
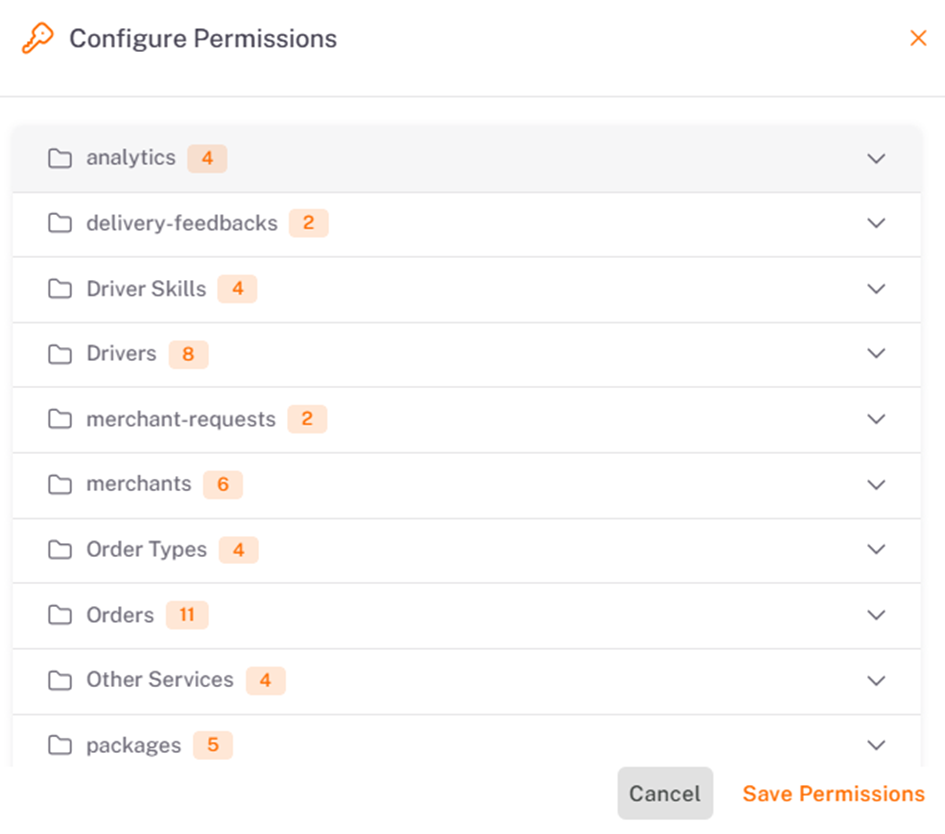
Select the permissions corresponding to this role.
Permissions can cover:
Order management
Partner management
User management
Viewing analytics
Account settings
Returns management
Delivery tracking
Click on Save to save the role.
The new role becomes immediately available when creating or editing a user.
Editing a User
To edit a user's information:
Open the user list.
Select the relevant user.
Click on Edit.
Modify the desired information.
Click on Save.
Changes are saved immediately.
Deactivating a User
When a team member no longer requires access to the platform, it is recommended to deactivate their account.
This action prevents any new login attempts without deleting data associated with the user.
Best Practices
To ensure secure user management:
Assign an individual account to each team member.
Avoid credentials sharing.
Use strong passwords.
Regularly review roles and permissions.
Immediately deactivate accounts of users leaving the company.
Grant only the permissions necessary for the job position.
Was this article helpful?
Still need help?
Contact support